Step-by-Step Registration Guide
Follow these steps to register for classes, from preparing for Advance Registration through to the Add/Drop period.
Or, skip to the step that you need guidance on.
Before Advance Registration
Log in the Student Center on TC Online
Find Your Registration Appointment Date
Check Your Holds
Search for Classes and Fill Your Shopping Cart
Advance Registration and the Add/Drop Period
Enrolling Using Your Shopping Cart
Joining a Wait List
Swapping, Dropping, and Editing Classes
Enrolling using a PIN
The Add/Drop Period
Logging in to the Student Center
All enrollment activity on TC Online is conducted on the Student Center page. To access the Student Center, do the following:
Find Your Registration Appointment Date
Once appointments have been assigned for the upcoming registration period, you can check your enrollment appointment in the Enrollment Dates box.
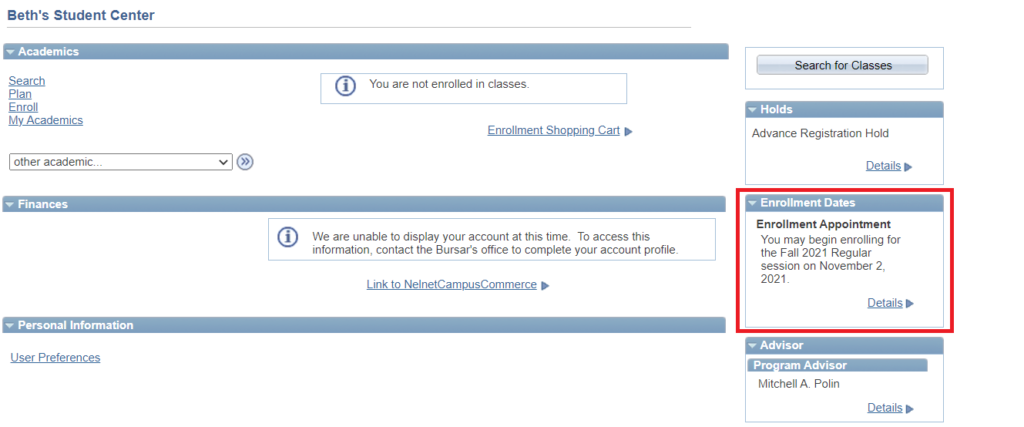
In some cases, the appointment date listed in this box might be for a semester earlier than the one in which you want to enroll. If so, or to find more details about your enrollment appointments, click on the Details link to see detailed information about your appointment dates and times.
Check Your Holds
You can check your holds at any time on the Student Center page. To do so, click on the Details link in the Holds box on the upper-right corner of the page. If you have any holds, a summary of them will appear.
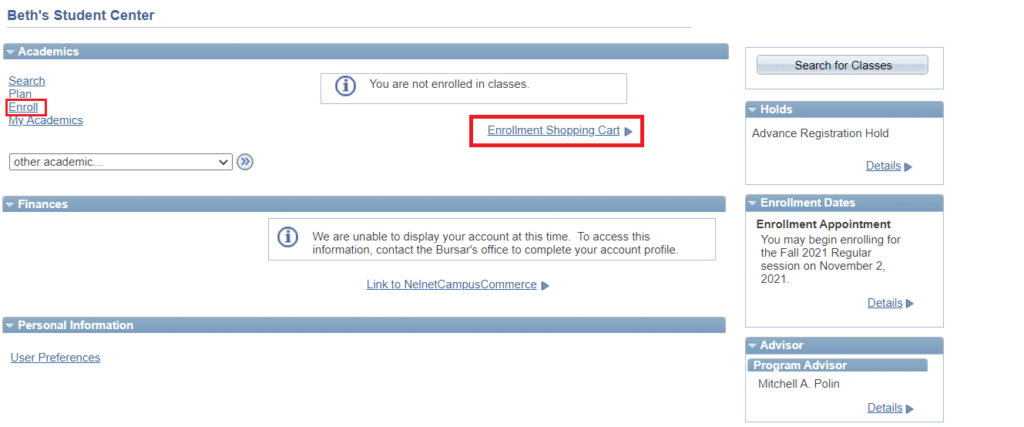
Search for Classes and Fill Your Shopping Cart
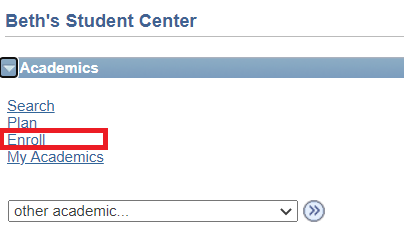
- From the Student Center page, click on the Enroll or the Enrollment Shopping Cart.
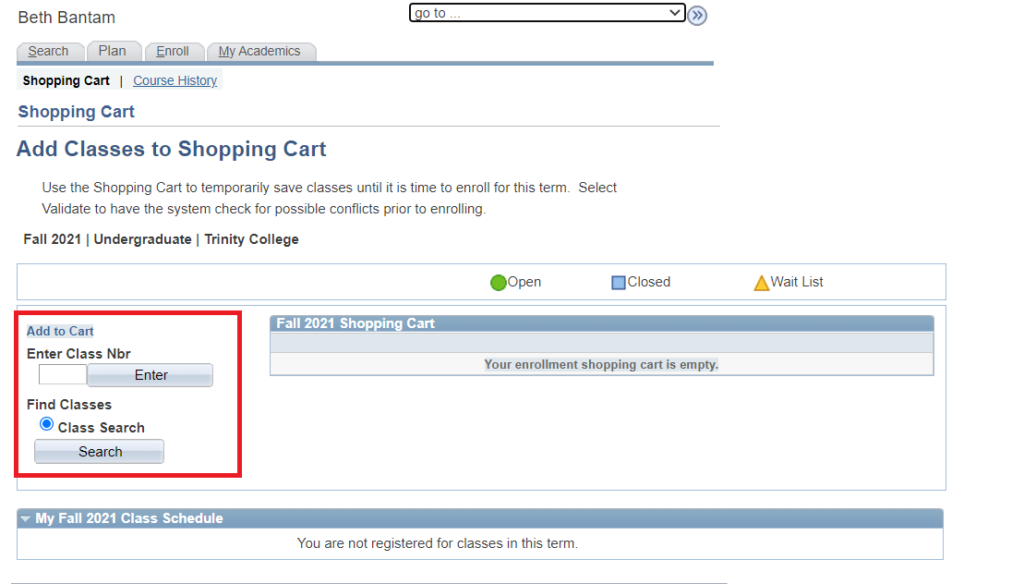
- Search for classes you wish to add by clicking Search. If you know a class’s four-digit class number, you can type it in the Enter Class Nbr.
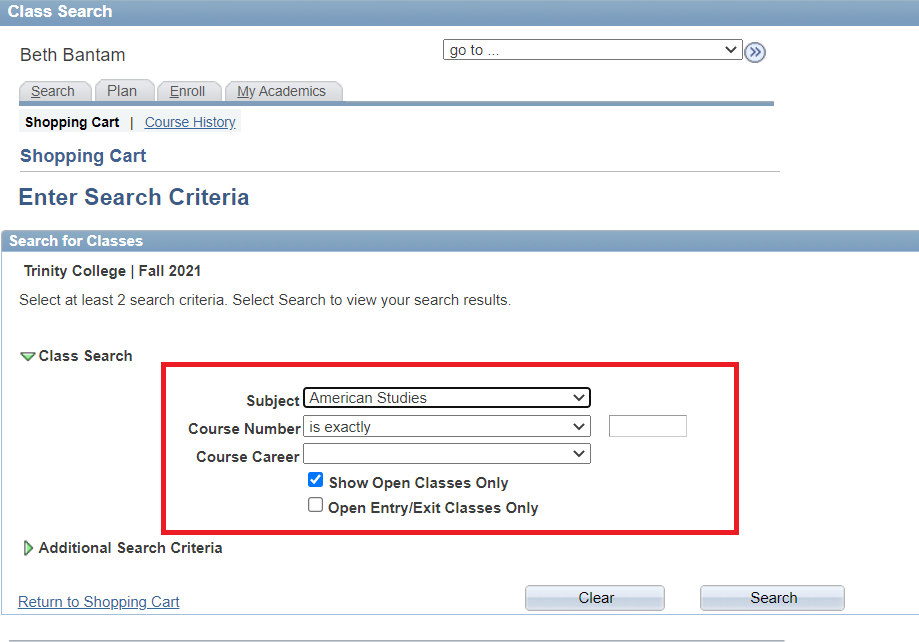
- You can search for a particular class by selecting a subject using the drop menu and entering a course number (PSYC 101), or you can leave the number blank for all classes in that department (PSYC). This search will default to Show Open Classes Only, but to include classes that are closed, uncheck that box.
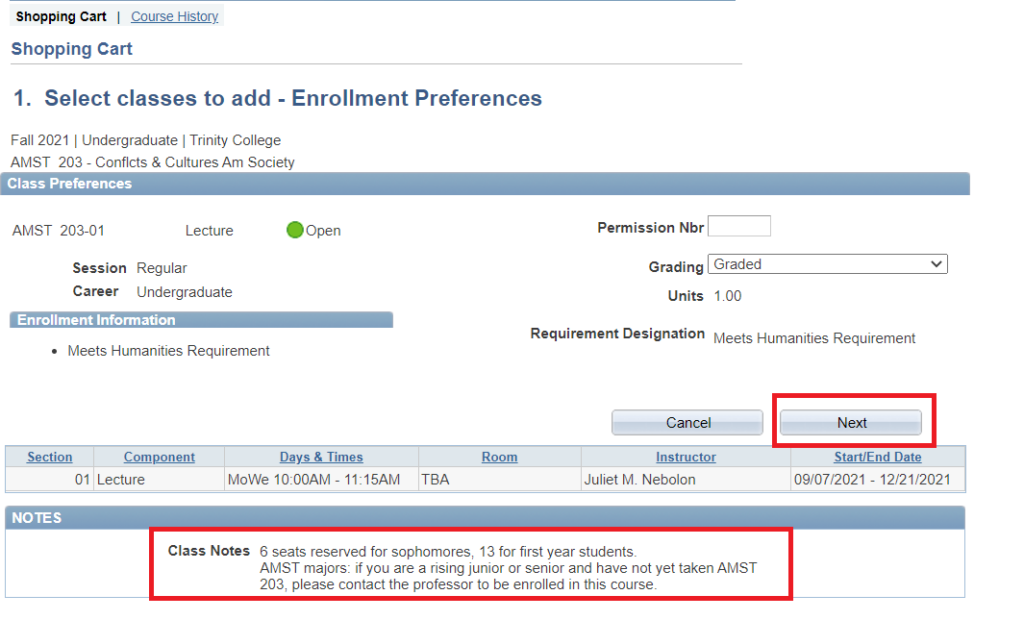
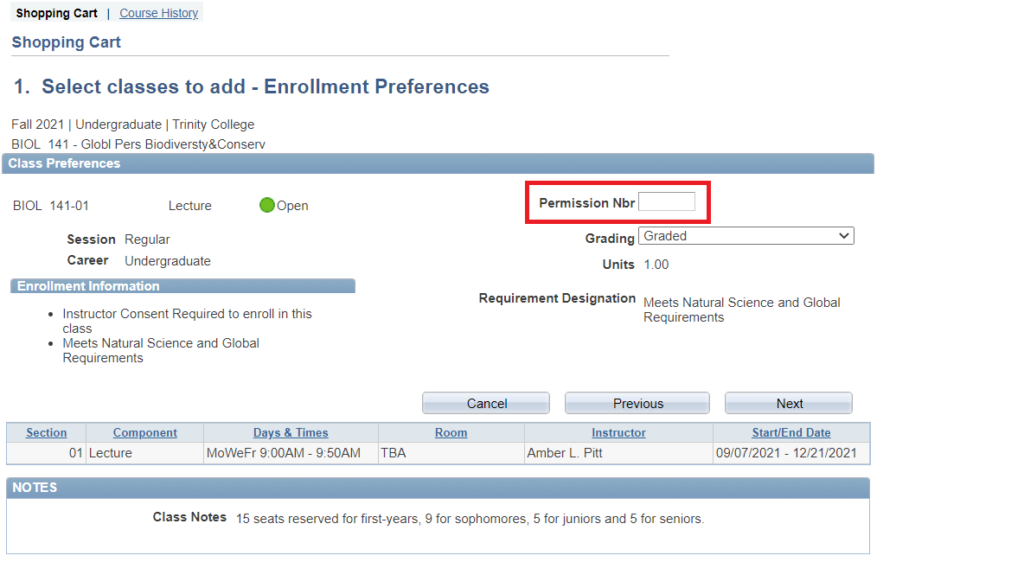
- The status of the class will appear in the subsequent course list. Classes that appear open may have enrollment caps for class years. Be sure to check the class notes in the next step to see if there are enrollment caps for class years. To see detailed information about the class, click on the Select.
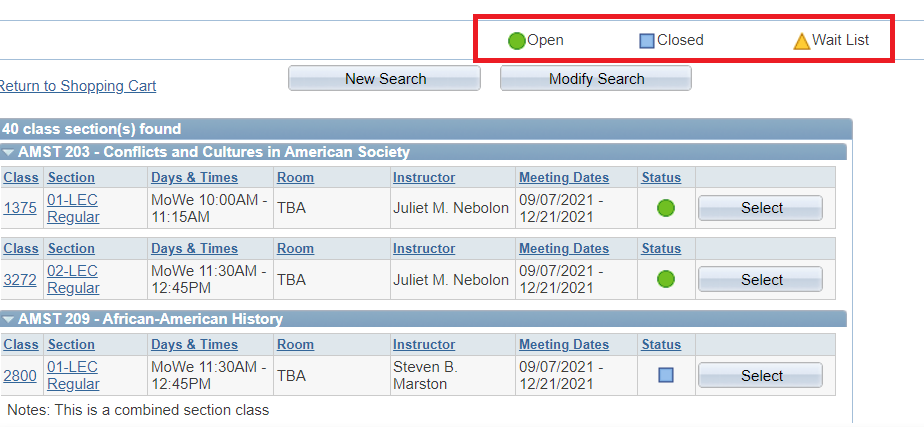
- Once you have selected the class you would like to add, click the Next button to add the class to your Shopping Cart. Add additional classes to your Shopping Cart by following the same procedure.
- Instructions on adding yourself to the wait list for a class can be found here.
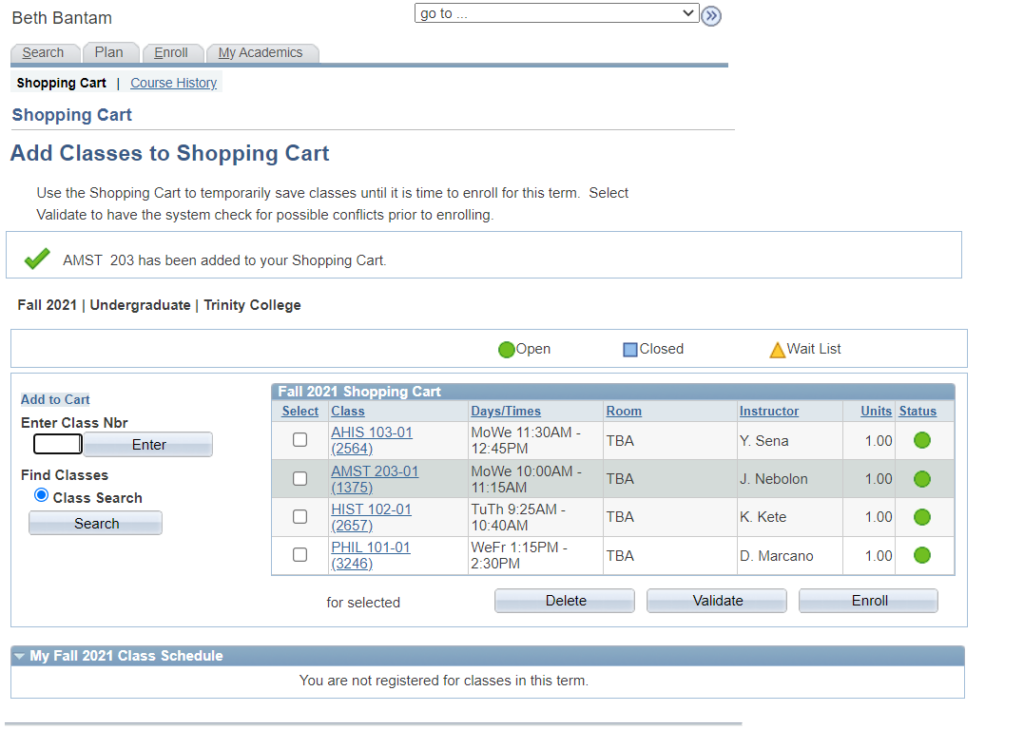
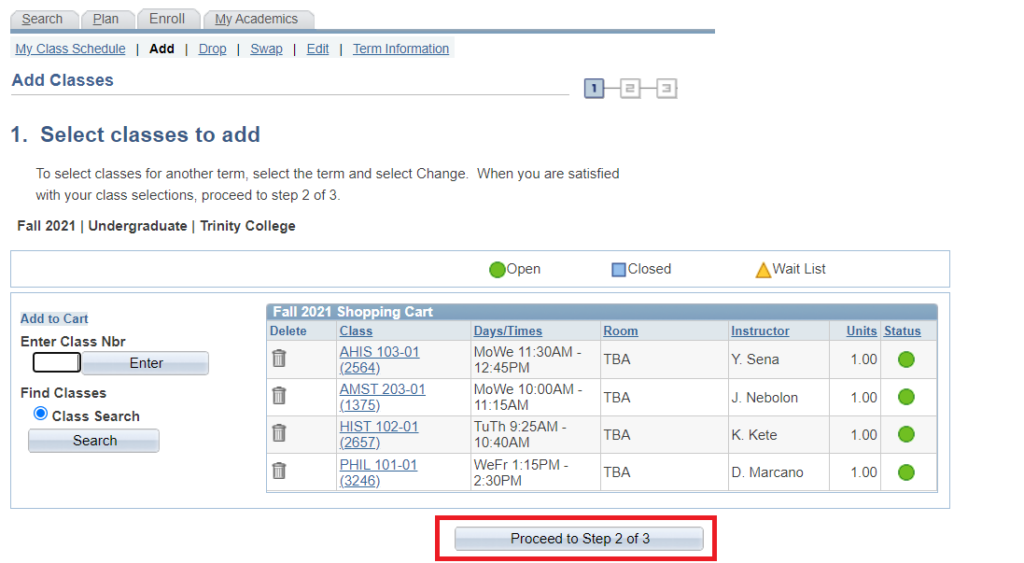
- As you fill your Shopping Cart, you will see the display below. Once you have selected the classes you want, you are ready for your enrollment appointment.
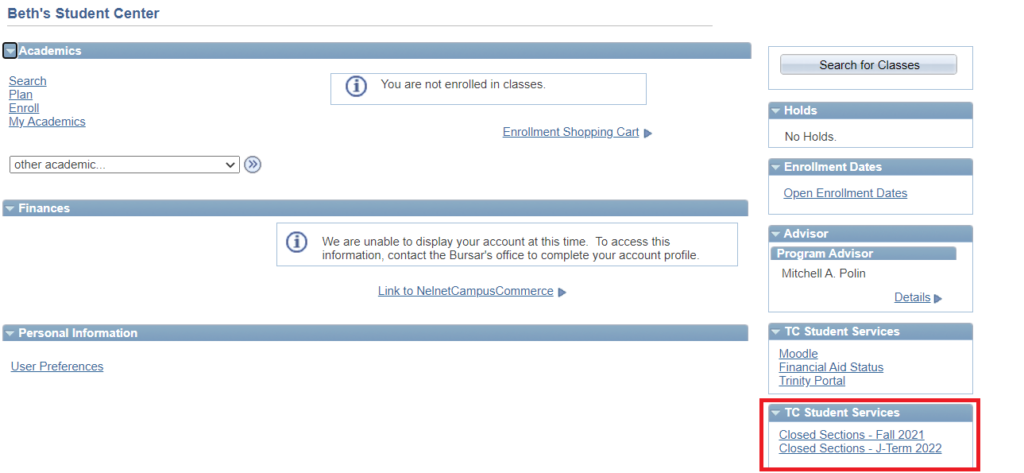
- Be sure to check enrollments in the classes in which you wish to enroll the night before your appointment so that you don’t waste time trying to enroll in classes that are already closed. A list of closed classes is updated throughout the day, every day, during Advanced Registration. A link to this list can be found on the right-hand side of your Student Center page.
Enrolling Using Your Shopping Cart
Registration appointments begin at 7:00 AM on the day assigned to your class, and remain in effect until the end of Advance Registration. You can register or make changes to your enrollment from when your appointment opens until the end of the Add/Drop period.
During Advance registration, you may enroll in up to 4.75 course credits; after Add/Drop opens, you can enroll in up to 5.75 course credits.
Be sure to keep only one window open to TC Online at a time. If you have more than one window open you could get logged out of your enrollment session, causing you to have to log in again.
- At your appointment time, click on the Enroll link again to go to the Enrollment Page.
- Click Proceed to Step 2 of 3.
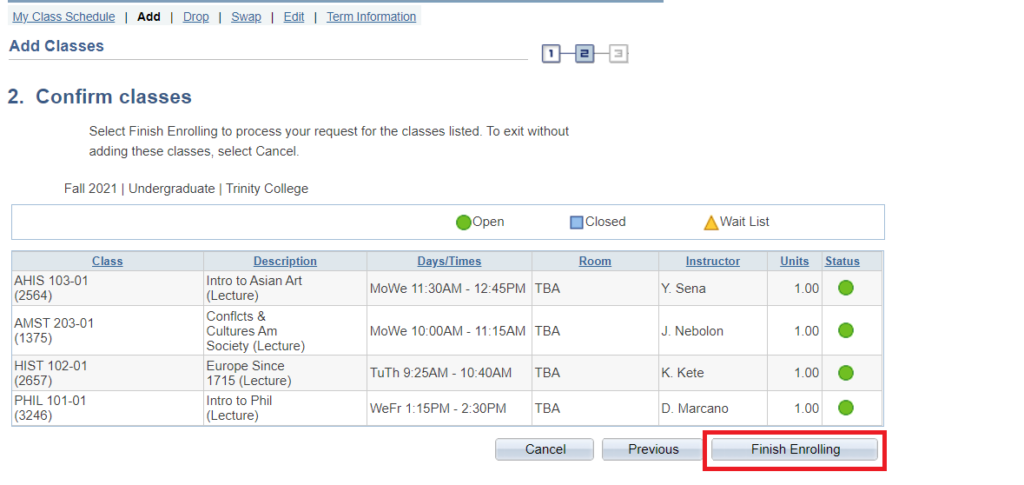
- Click Finish Enrolling
- The enrollment results will be displayed. The green check mark indicates the transaction was successful, and a red X indicates an error. The reason for the error will be displayed in the “Message” box.
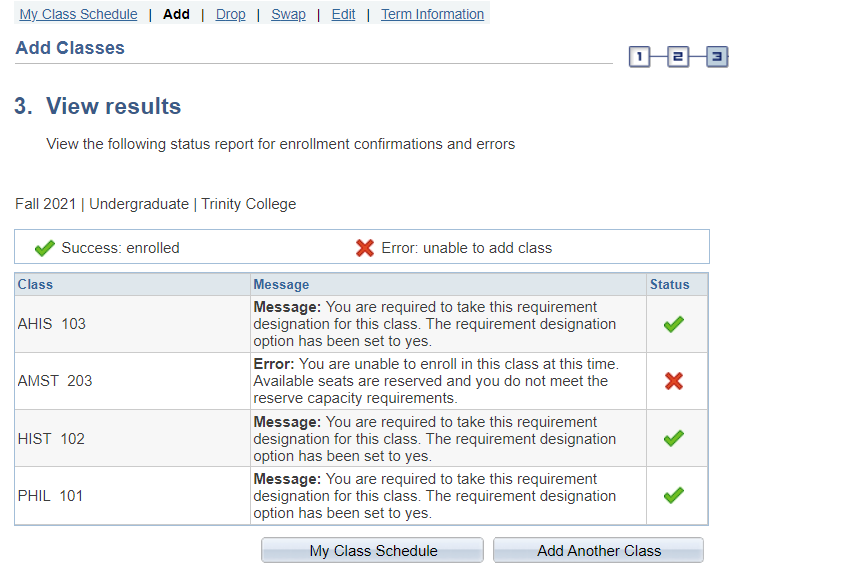
When you are done registering or making changes, you can review your updated schedule by clicking on the My Class Schedule link on the Enrollment page.
Swapping, Dropping, and Editing Classes
Dropping Classes
From the Student Center, click Enroll. From the Enrollment Page, click the Drop link. On your list of current classes, check the box next to the class you wish to drop. Then, click “Drop Selected Class,” then “Finish Dropping.”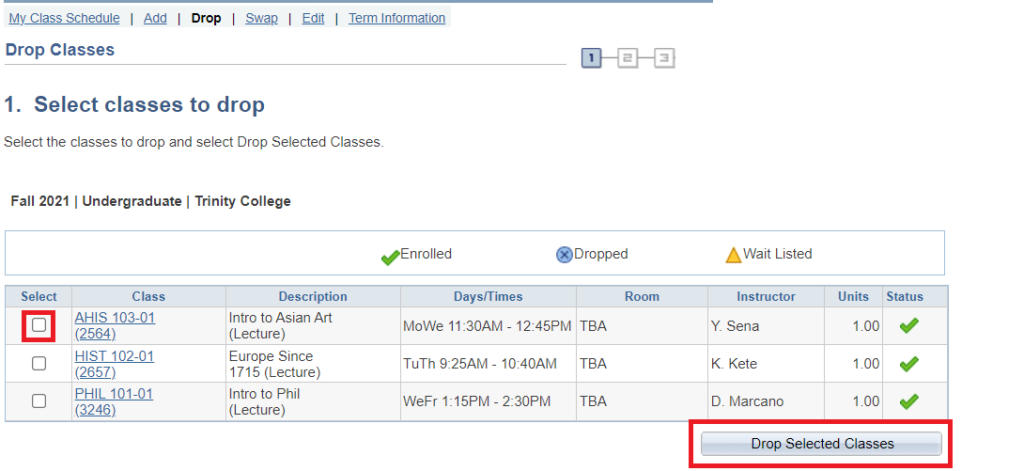
Swapping One Class for Another Class
From the Student Center, click Enroll. From the Enrollment page, click the Swap link. On your list of current classes, select the class you wish to swap out. Enter the class you wish to add using the search function or enter the four-digit number as detailed above. Click enter, then next, and finally Finish Swapping.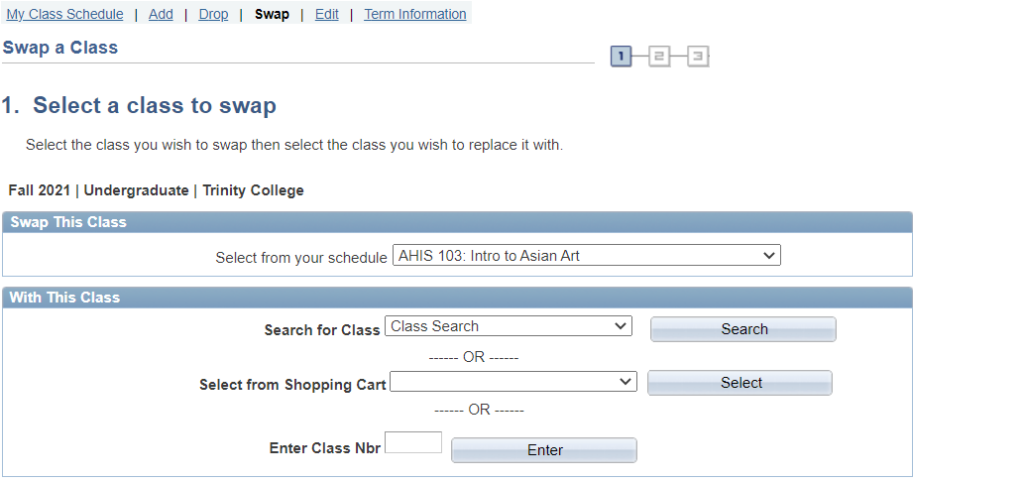
When you use Swap, TC Online will only process the drop if it is able to add you to the new class. Therefore, the Swap option is recommended unless you are certain you want to drop a class. However, if the “Wait List Okay” box is checked, and the class you would like to swap in to is full, you will be dropped from the old class and added to the wait list in the new class.
Editing Classes
From the Student Center, click Enroll. From the Enrollment page, click the Edit link. This is where you can make a class Pass/Low Pass/Fail. Select the class you want to change, and on the next page change the status of Graded to Convert ABCDF to PLF.
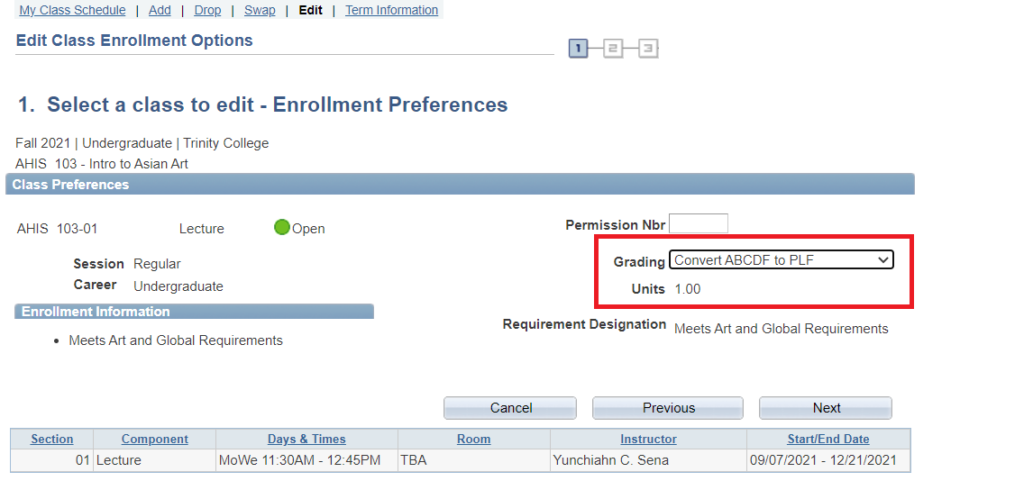
Enrolling in a Class Using a PIN
The “Edit” screen is where you can enter a PIN given to you by the department or the instructor offering the class. If you are having trouble using a PIN, refer to this guide for instructions.
The Add/Drop Period
The Add/Drop period starts on the day following the end of Advance Registration, and ends at the end of the sixth day of classes.
You will be allowed to make changes to your schedule during that time and add an additional course credit, up to the limit of 5.75 course credits, if desired. These changes can be made from the Student Center on TC Online. You can still search for classes using the steps detailed in the “Search for Classes and Fill Your Shopping Cart” section.
Please see the Academic Calendar for specific dates for first quarter and regular, and second quarter classes. The end of the Add/Drop period is also the last day to declare a class Pass/Low Pass/Fail.